
How I Use a Backdrop to Display my Prints
When selling art at an event (like in Artist Alley at a convention), one of the most important things to consider is your booth setup. The goal is to make it attractive to entice people to stop at your table or booth for a minute and look around. In a way, it’s like giving your elevator pitch - you’re showing what you have to offer. You also don’t want to overdo it. If you make things too cluttered, it may cause some people to pass by without a second glance.
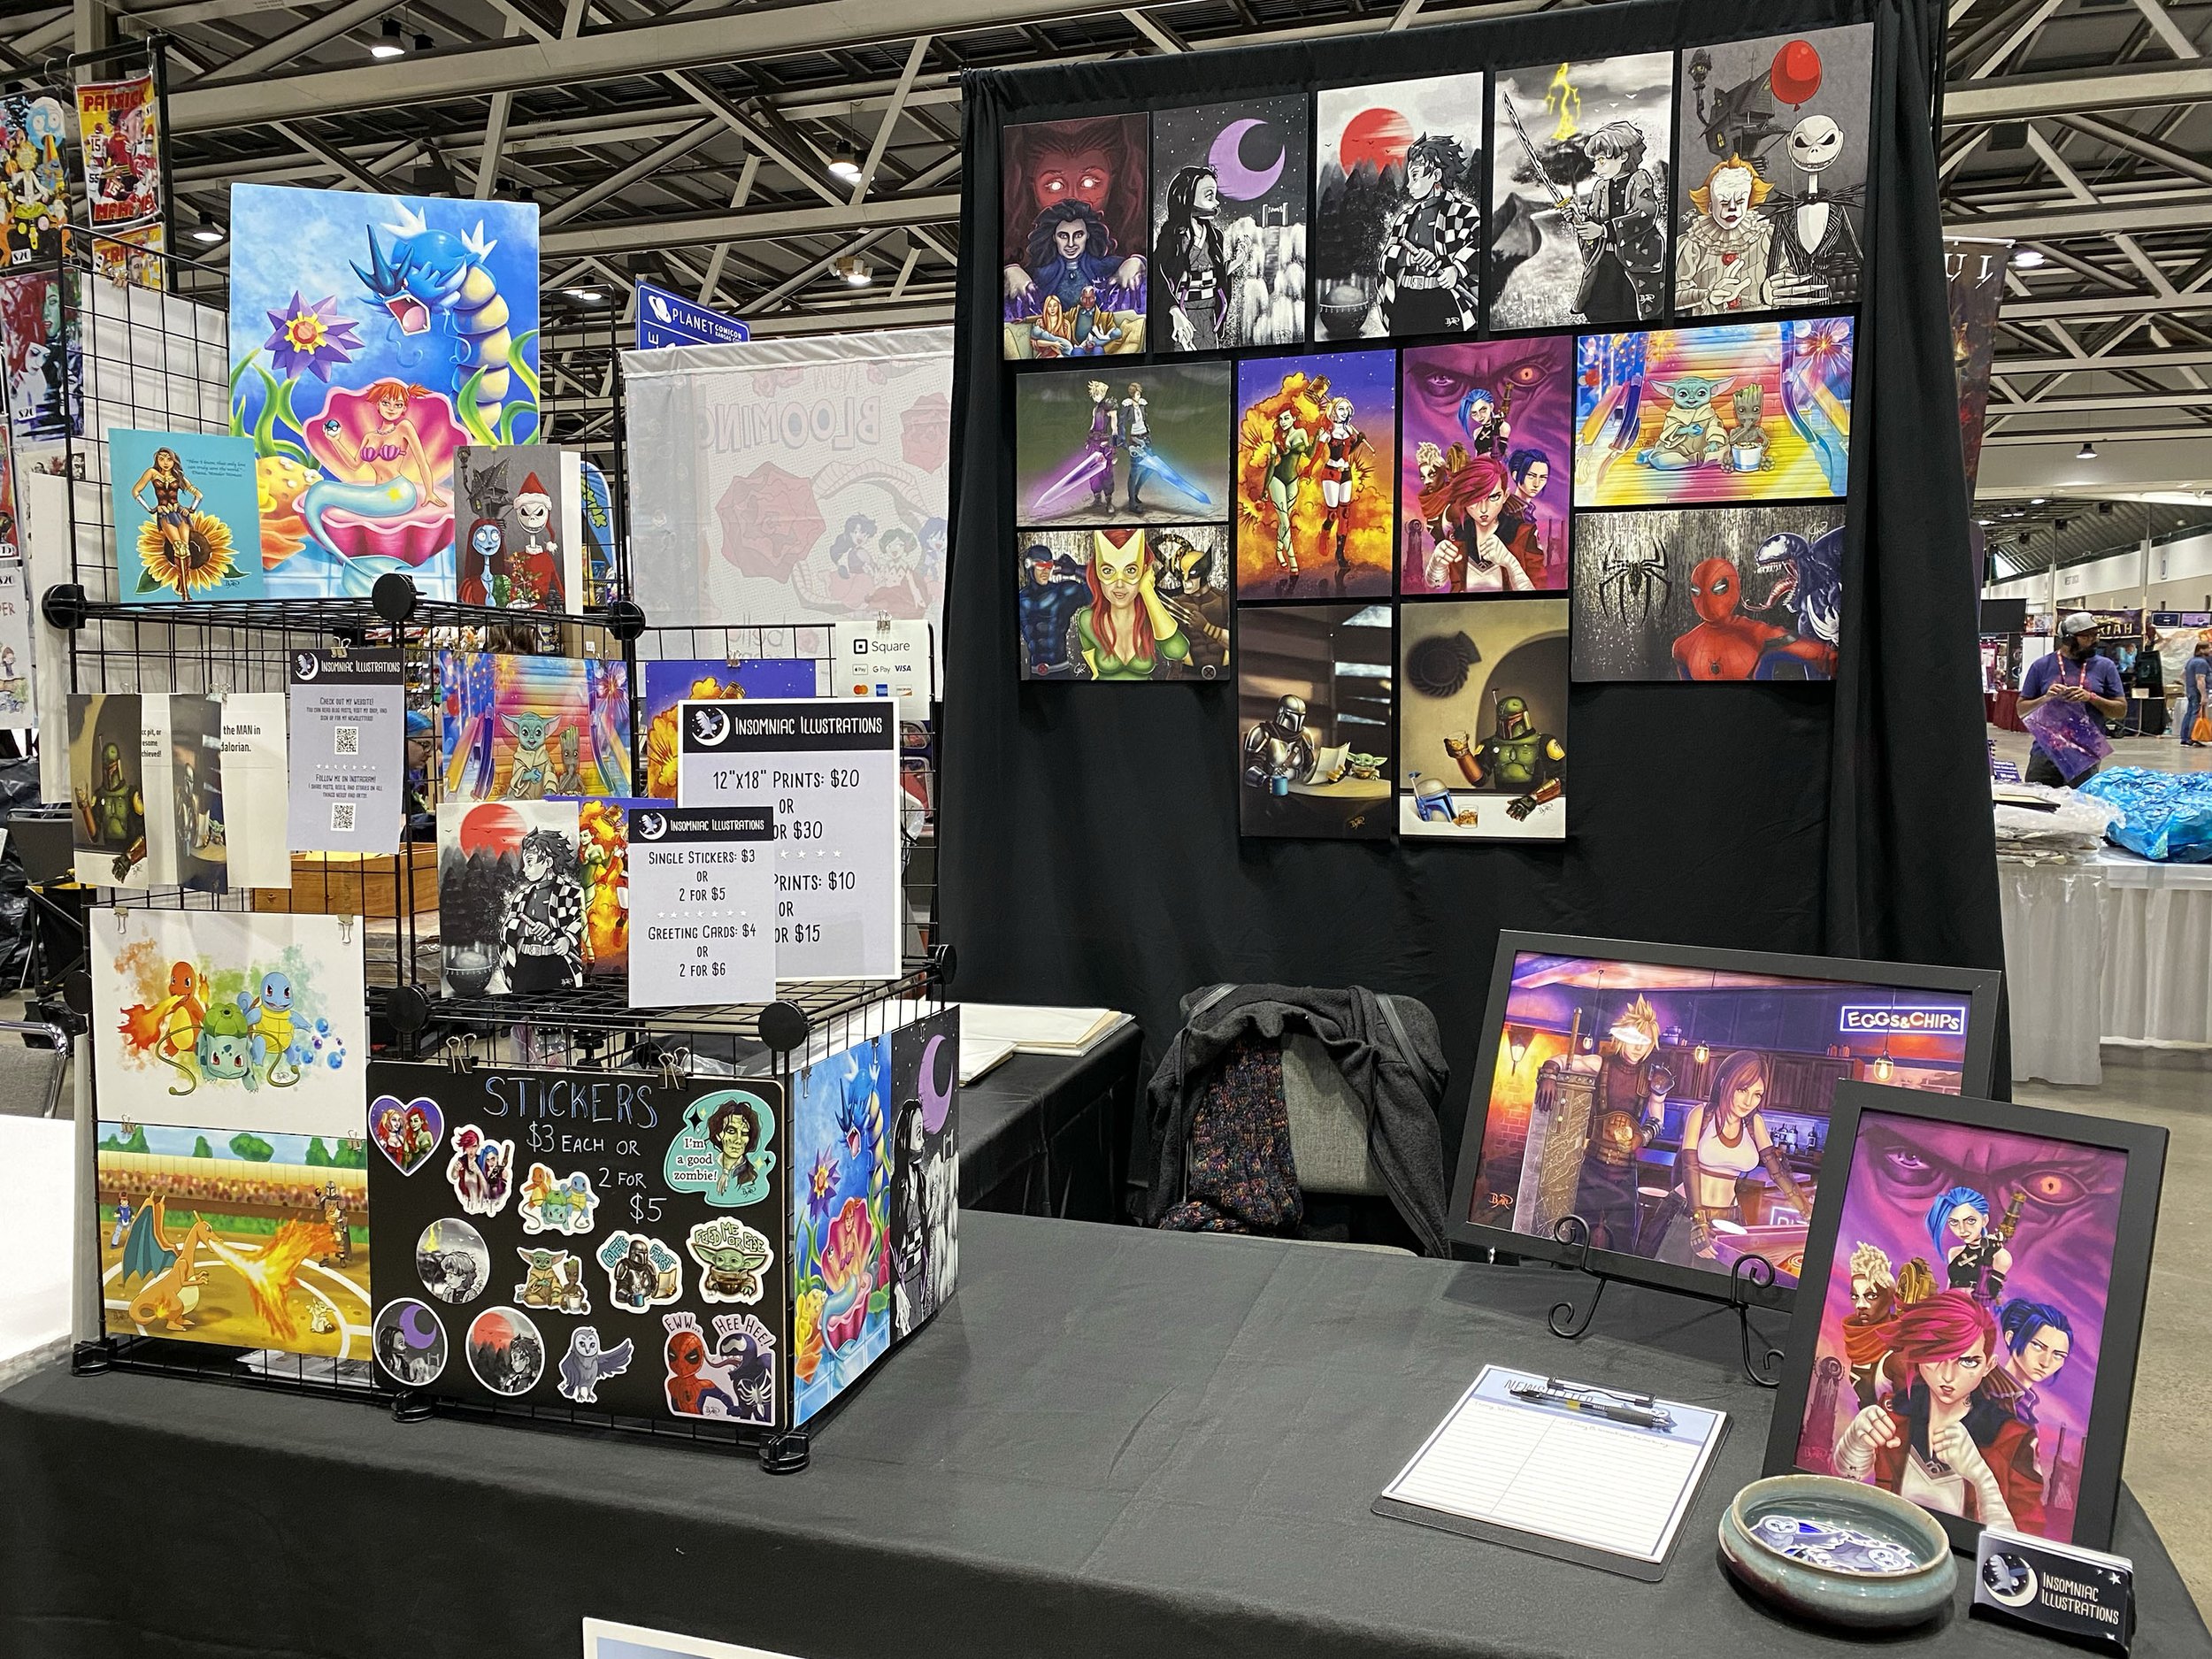
One of the main focuses in my setup is my backdrop. Here’s why:
It is a way for me to neatly display my print designs in their bigger size and refer to them when selling.
It’s easy for people to scan the designs and pick what they like. I will say the prints at the top get more views.
It serves as a way to block off my space, creating a boundary of sorts. If I’m at an event and I have someone set up behind me, I need that barrier to keep the attention on my stuff.
It adds height which is an easy way to catch a passerby’s attention as well.
I’ve been getting multiple questions about the backdrop that I use at shows. So, I thought it would be a good time to share what my setup is and how I display my prints.
My backdrop has two main parts: the frame and the backdrop sheet - both were ordered from Amazon. The frame brand is EMART and it’s compact but sturdy. I like that it can extend to 10’ wide with the 3 bars and can reach about a 9’ height. The backdrop is a basic black color and the fabric is thick and of good quality. I find it convenient that it is machine washable.

Even though preparing my prints involves a more complicated process, I like the way that I hang my prints because, to me, it looks more professional. It does a good job of showing the quality of my art. Plus, it’s super easy and quick to put up and take down if you have another person helping.
Additionally, I can adjust my arrangement to account for booth space or number of prints. The frame and photo backdrop are also easy to transport since they’re light and don’t take much space. This may be something to consider if you are traveling out of town or dropping off your equipment and supplies by yourself.
Preparing my Prints for Display
I make sure to assemble my display prints ahead of time because, like I said, it’s a process. I try to order new prints about a month before an event so that I have plenty of time to receive them and prepare them. If you want to see how I prepare for an event complete with a timeline, check out my previous blog post.
So, here are the supplies I use:
12” x 18” prints
20 x 30 foam board - 1/4 inch thickness
box cutter or x-acto knife
cutting mat
metal ruler
pencil, pen, or marker - thin tip
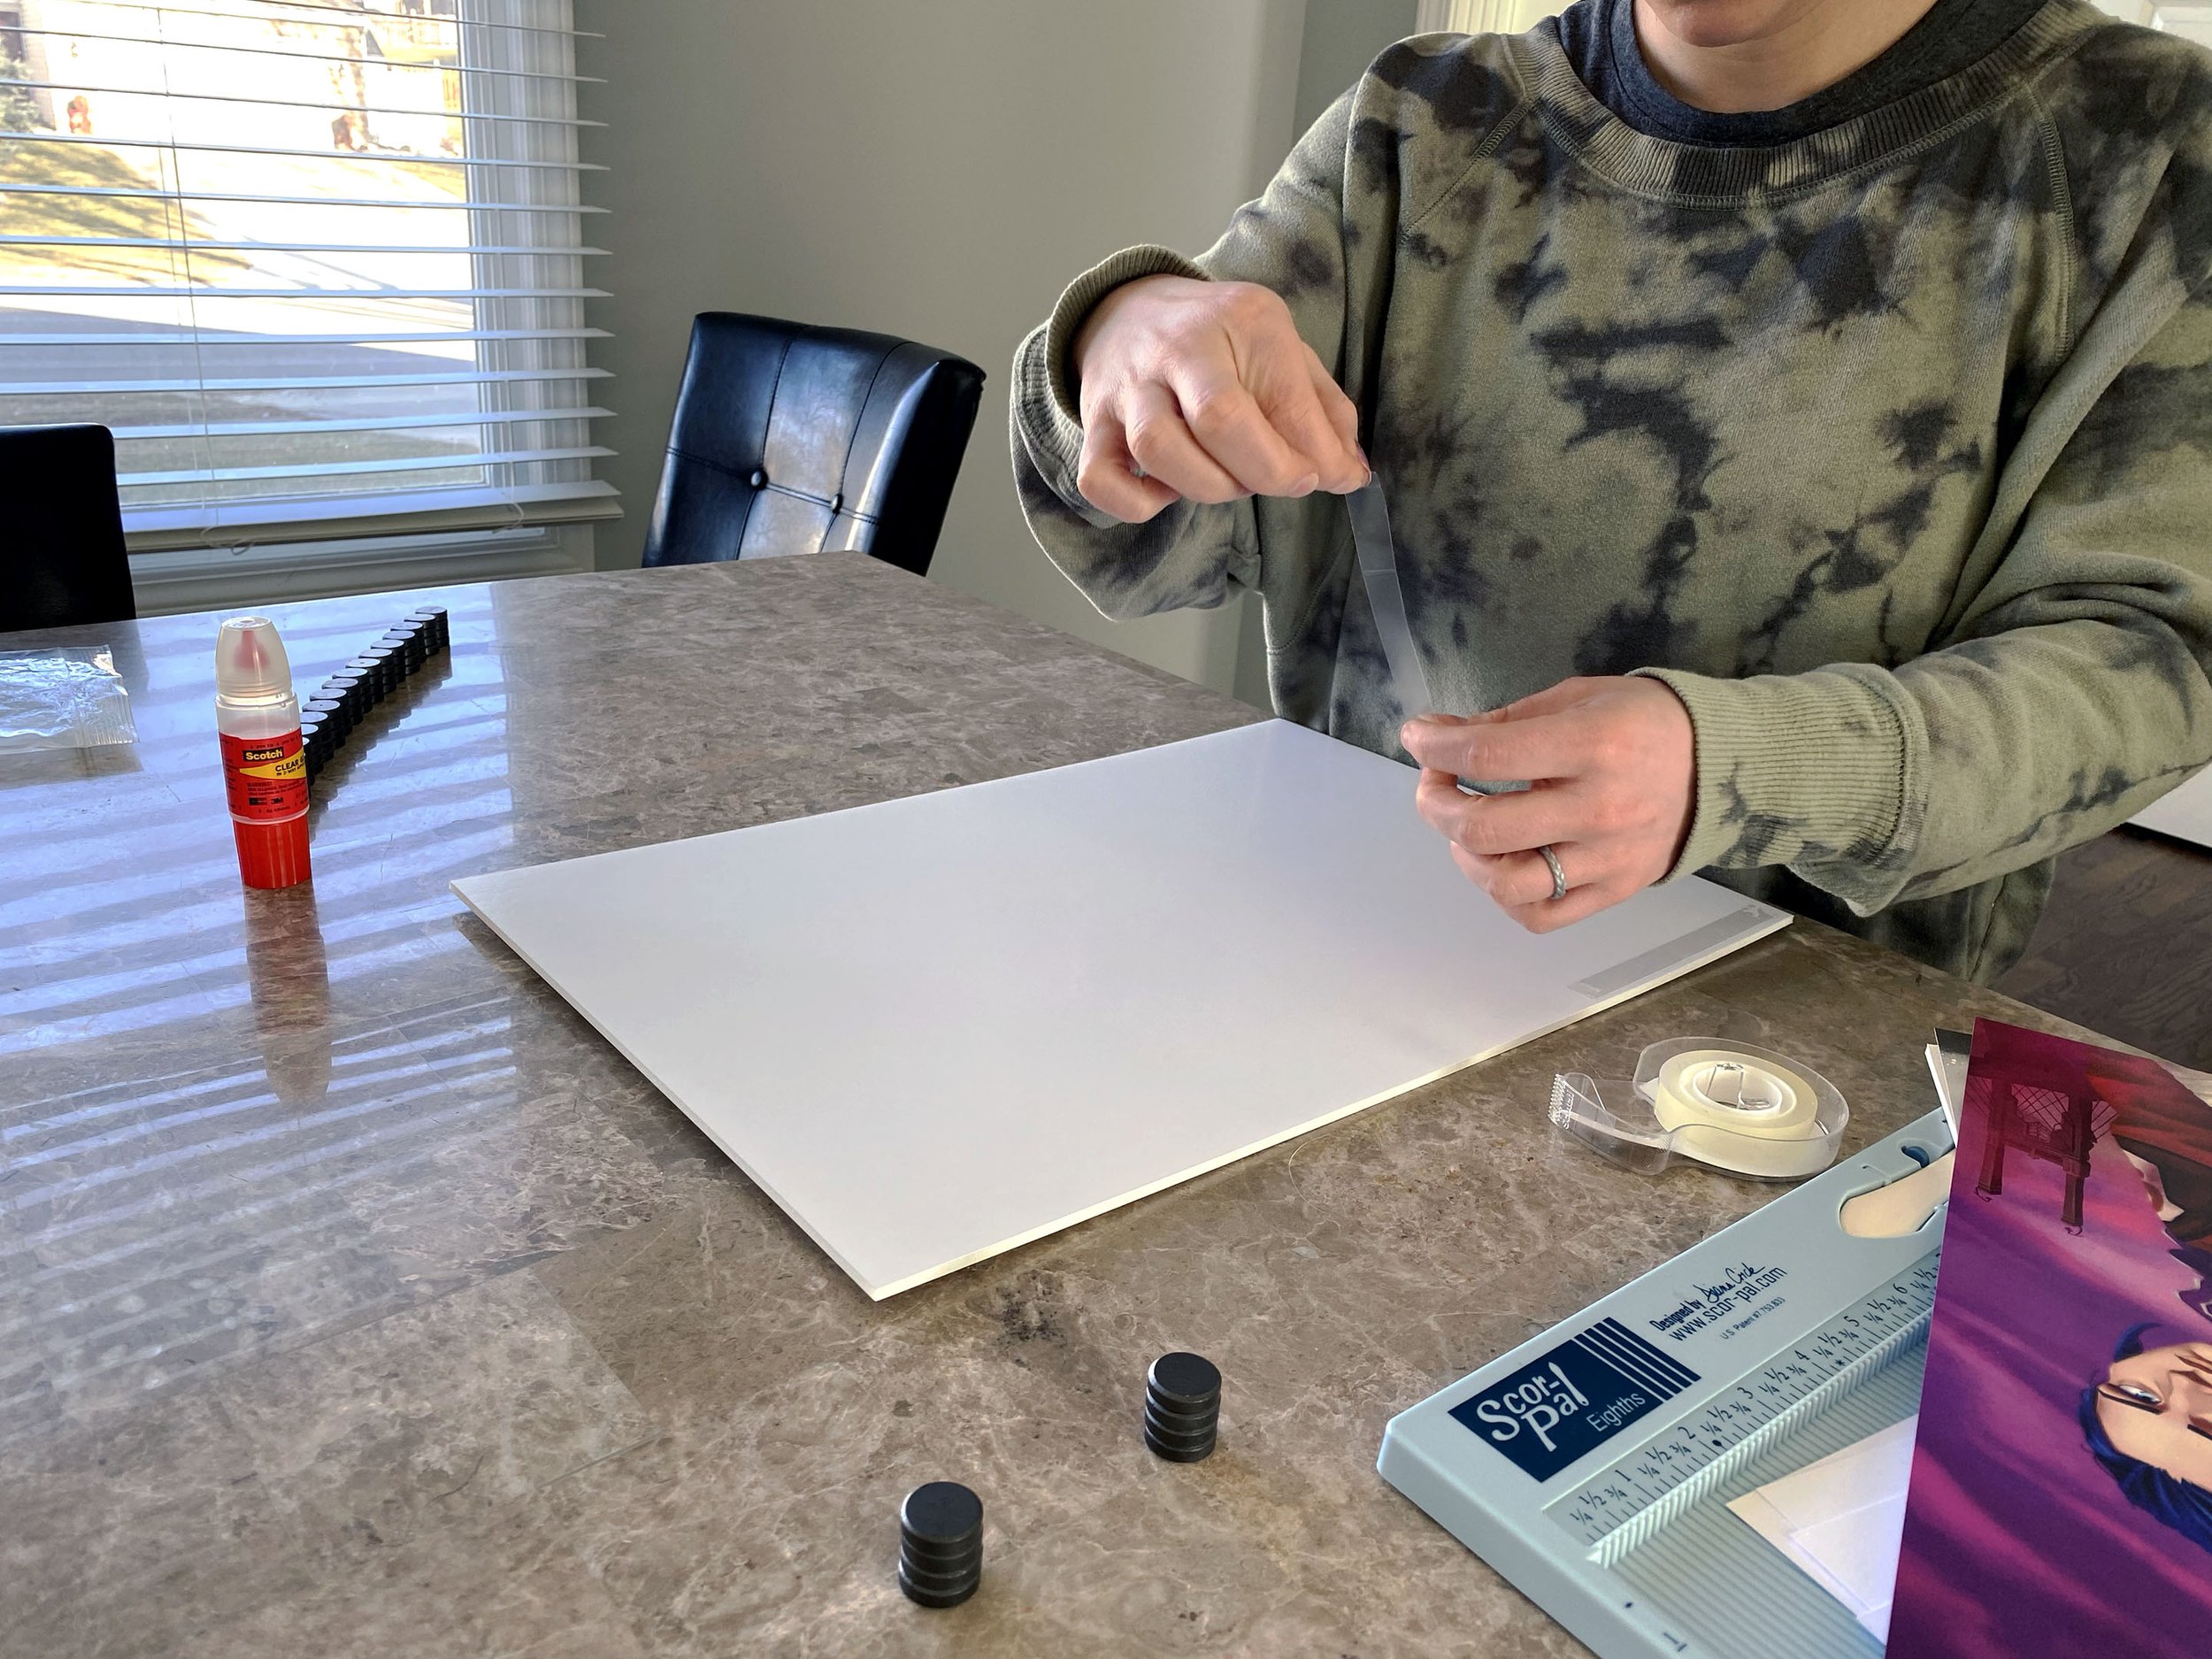
double-sided tape (my favorite is the Scotch Tape Runner)
glue (Elmer’s school glue or Scotch clear glue)
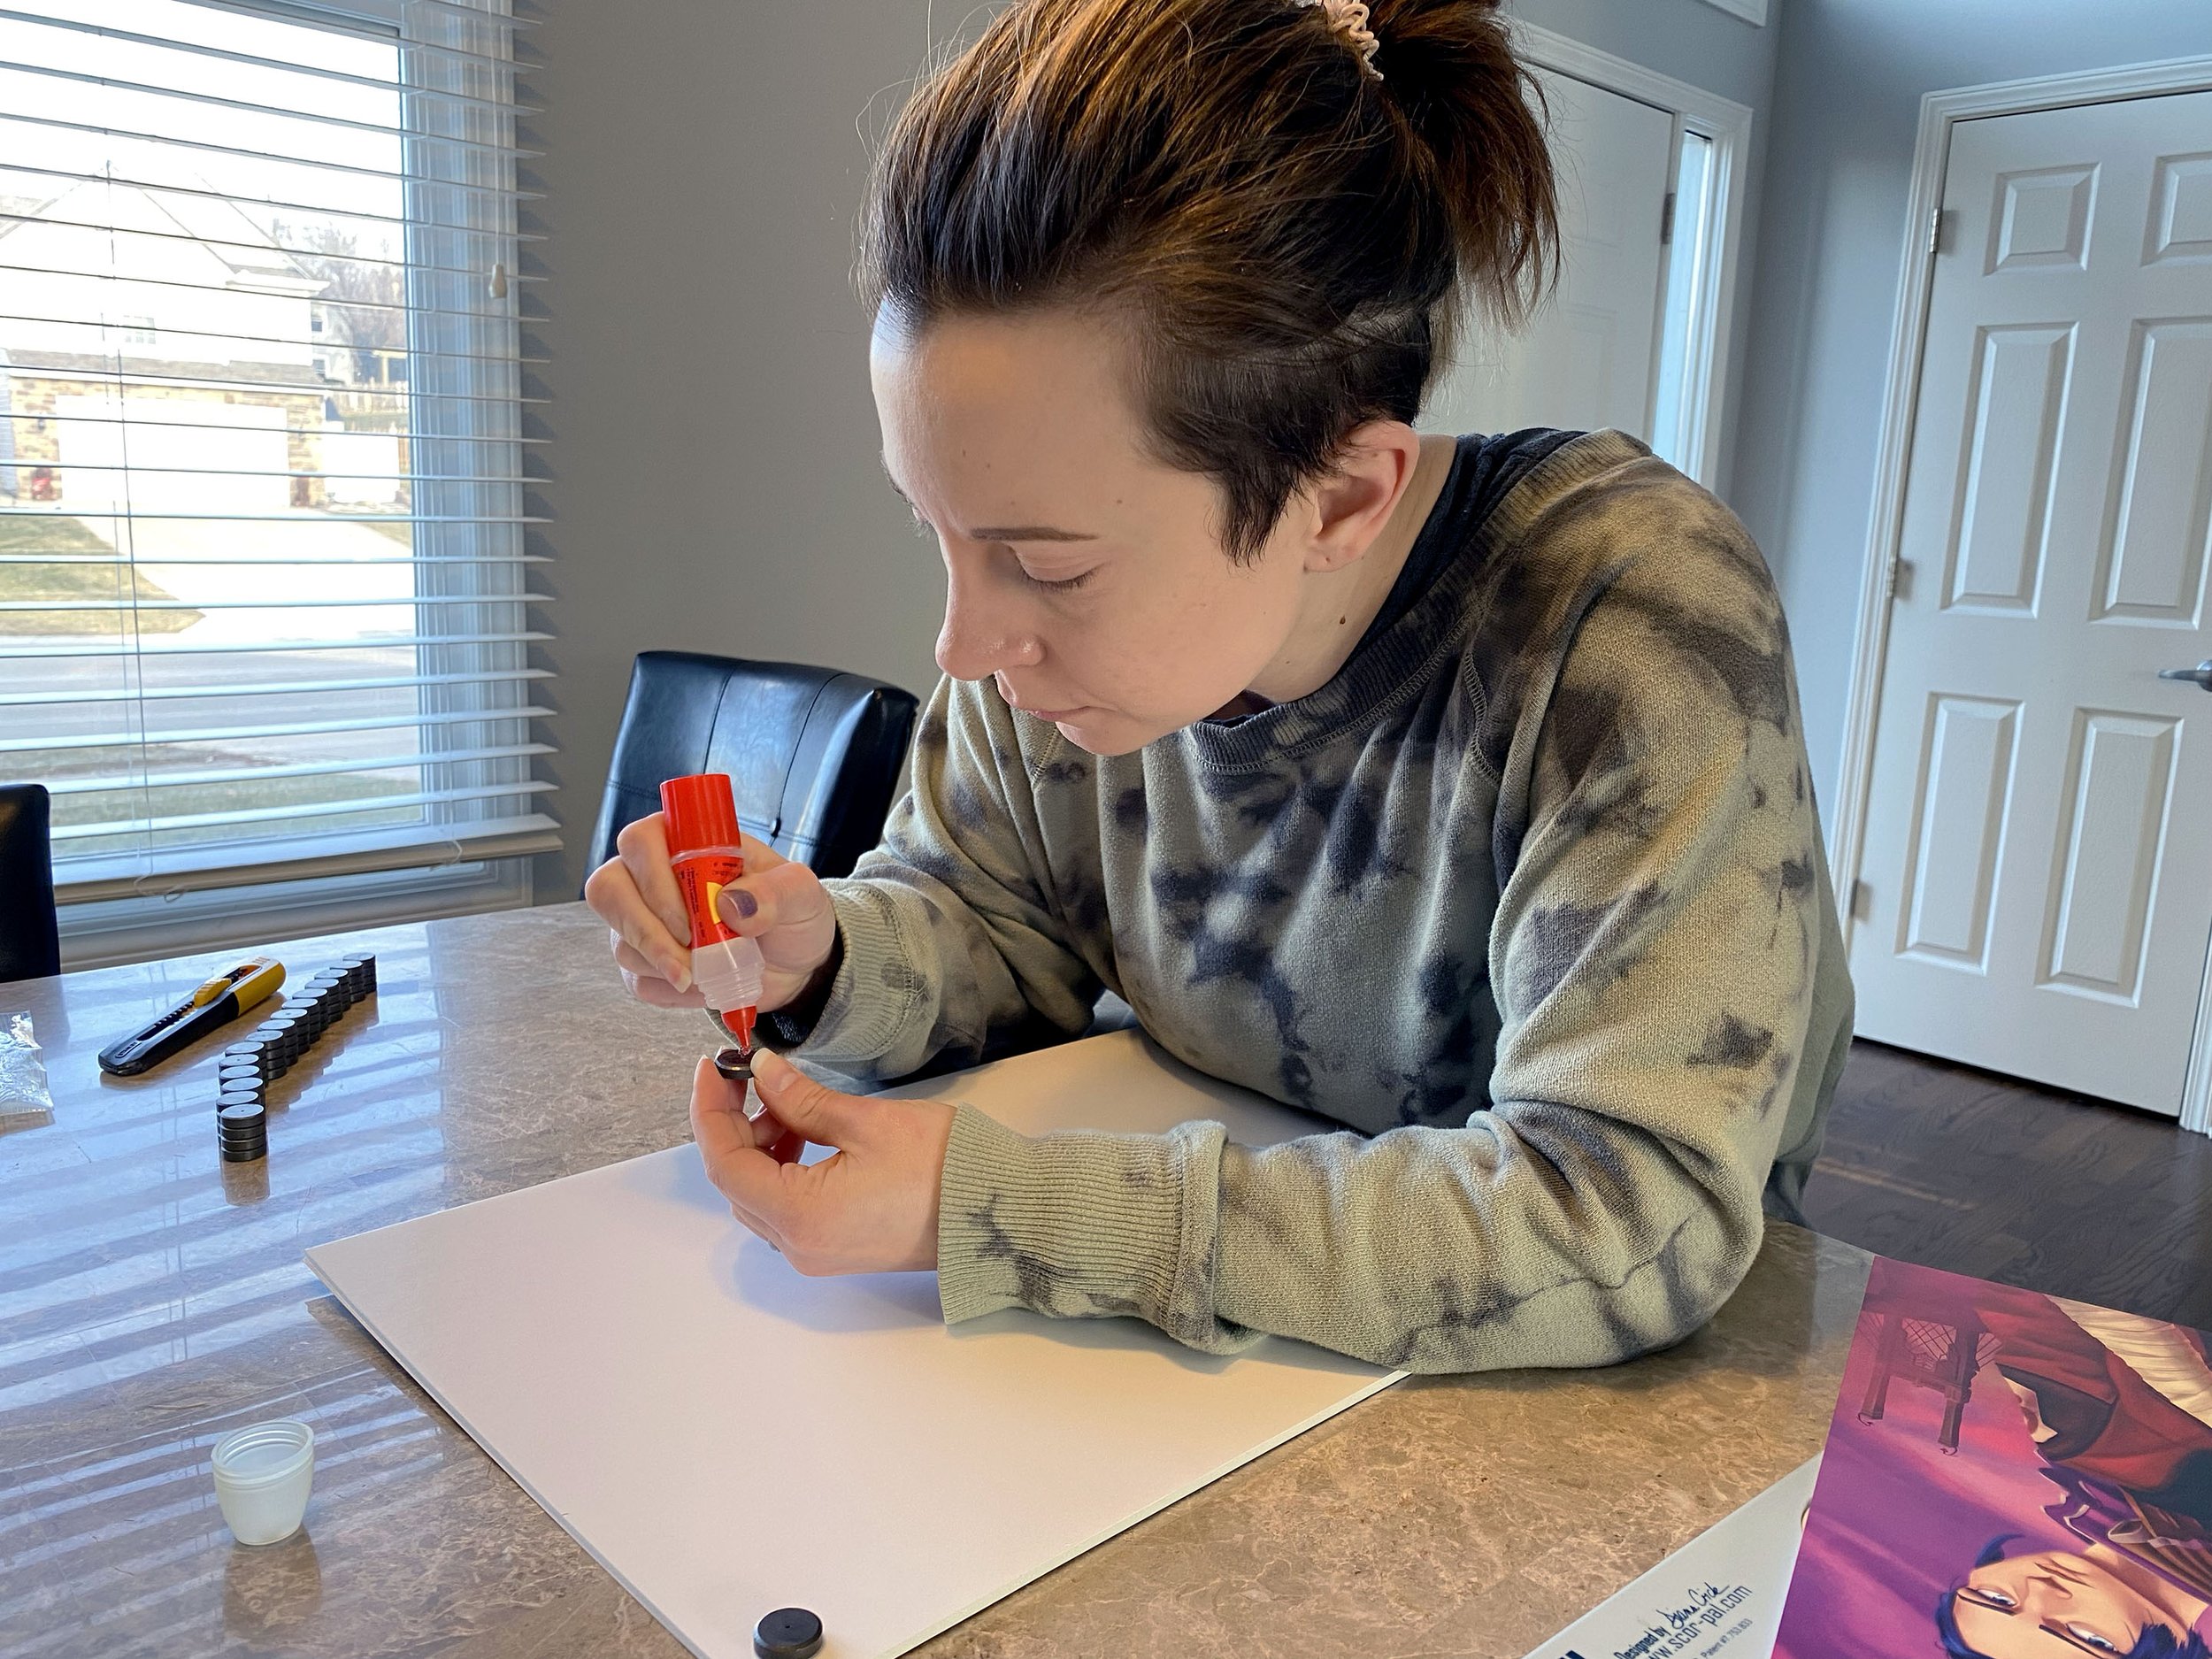
little round magnets (I ordered mine from Amazon - not affiliated, just happened to find my order)
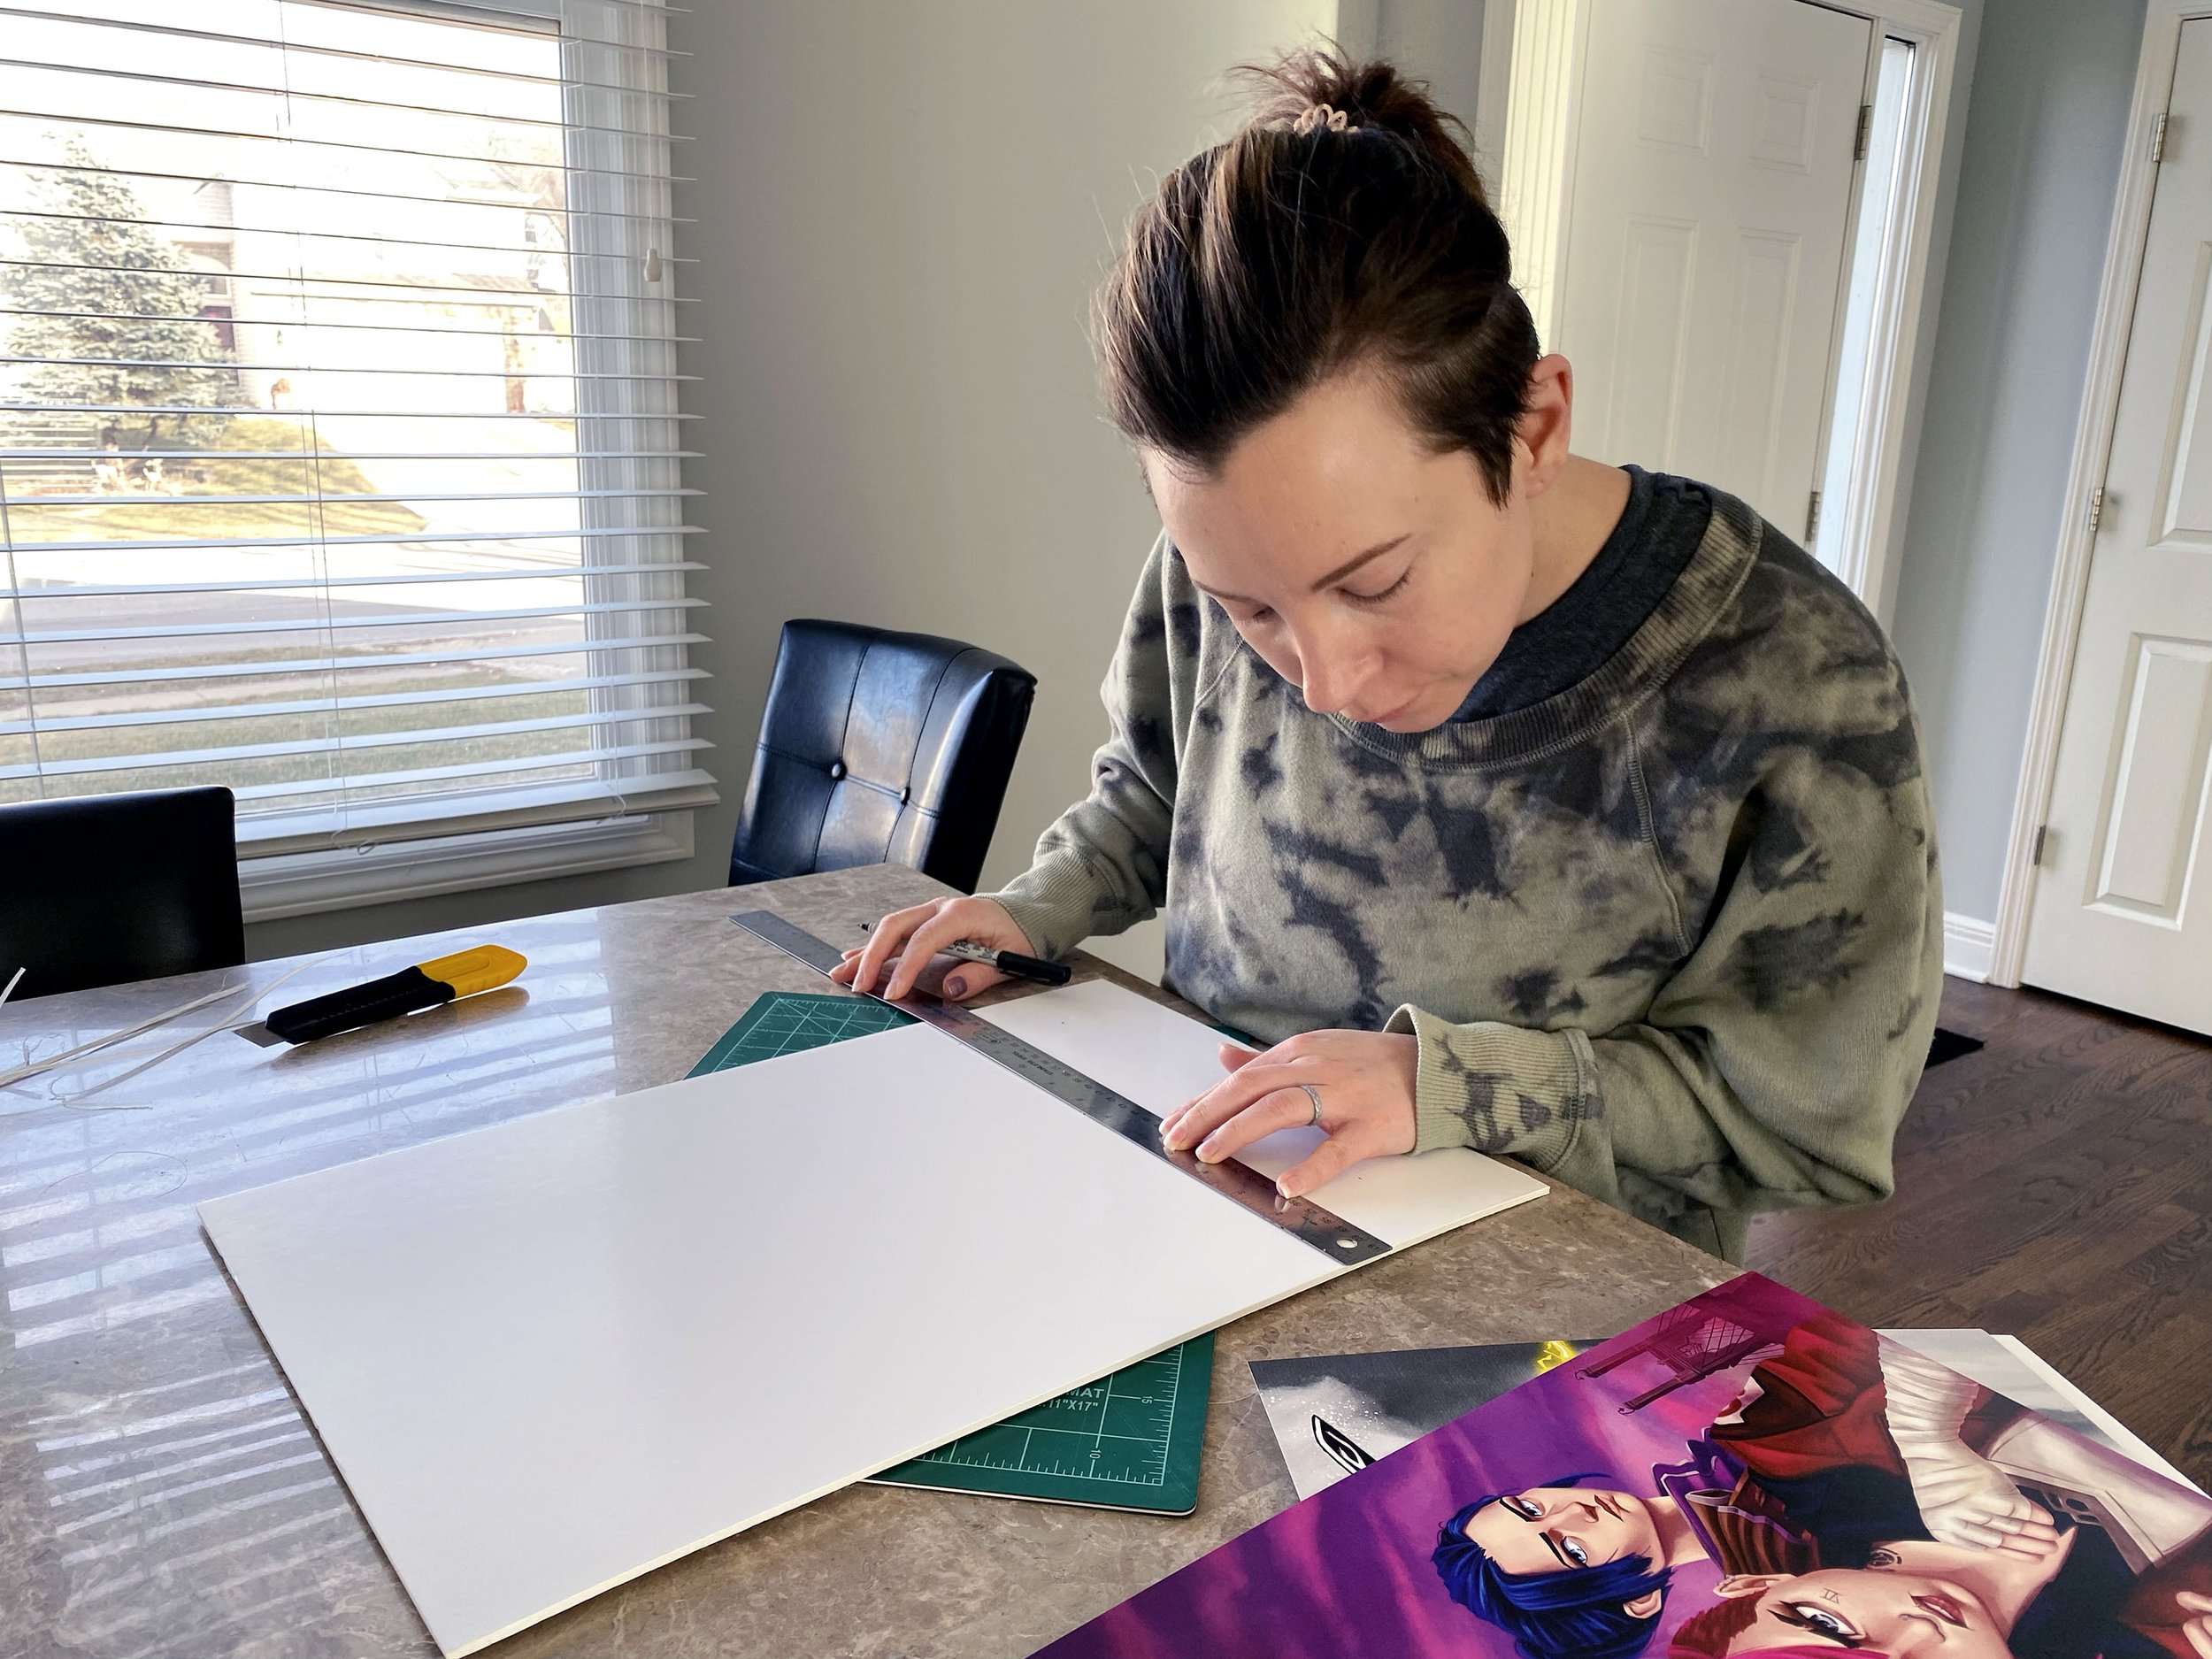

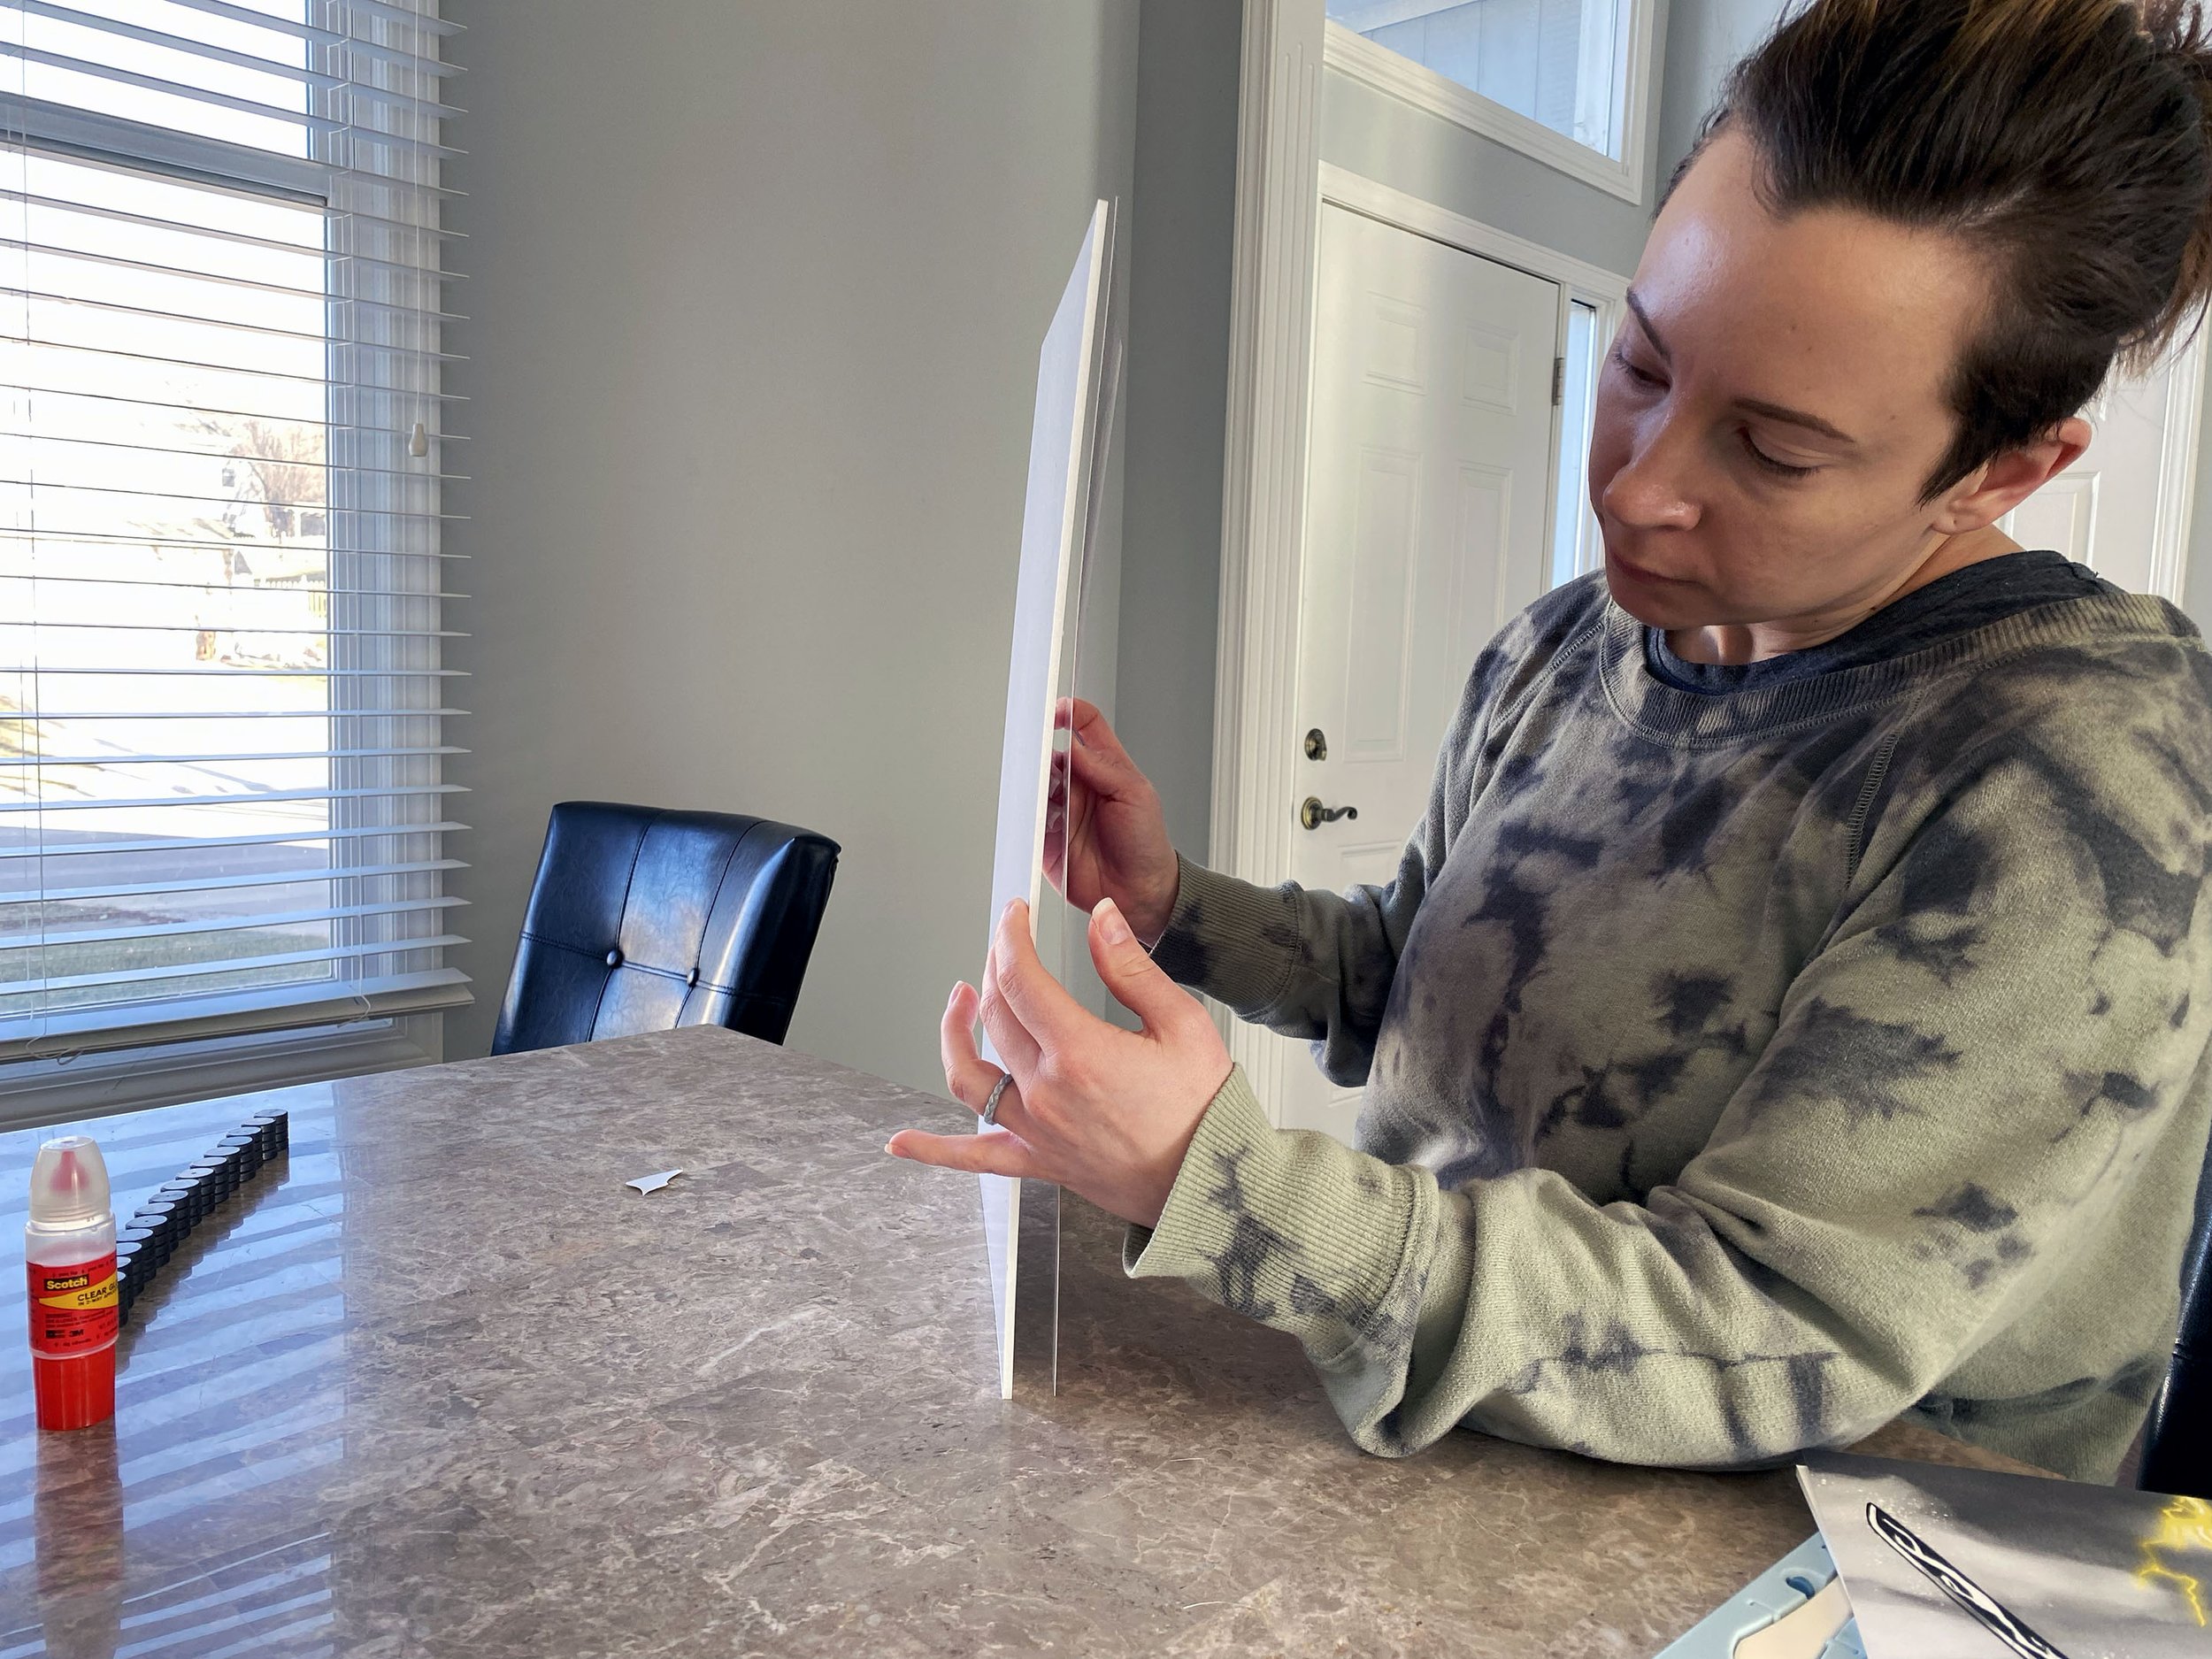
I start by measuring out my foam pieces - making them 12”x18” to fit my print. I put the foam board on top of my cutting mat so I don’t accidentally cut any surfaces. Then, I proceed to cut out the foam board by lining up the metal ruler with my marks and slowly making cuts with a sharp box cutter. I don’t try to cut all the way through in one go because I’m more likely to not cut a straight line. So, I make 2-3 passes with the box cutter. I continue doing this on all sides of the foam board until I have my 12”x18” piece. Oh, and PLEASE WATCH YOUR FINGERS. Always be aware of where your fingers are on the ruler as you’re cutting. We do not want any accidents…
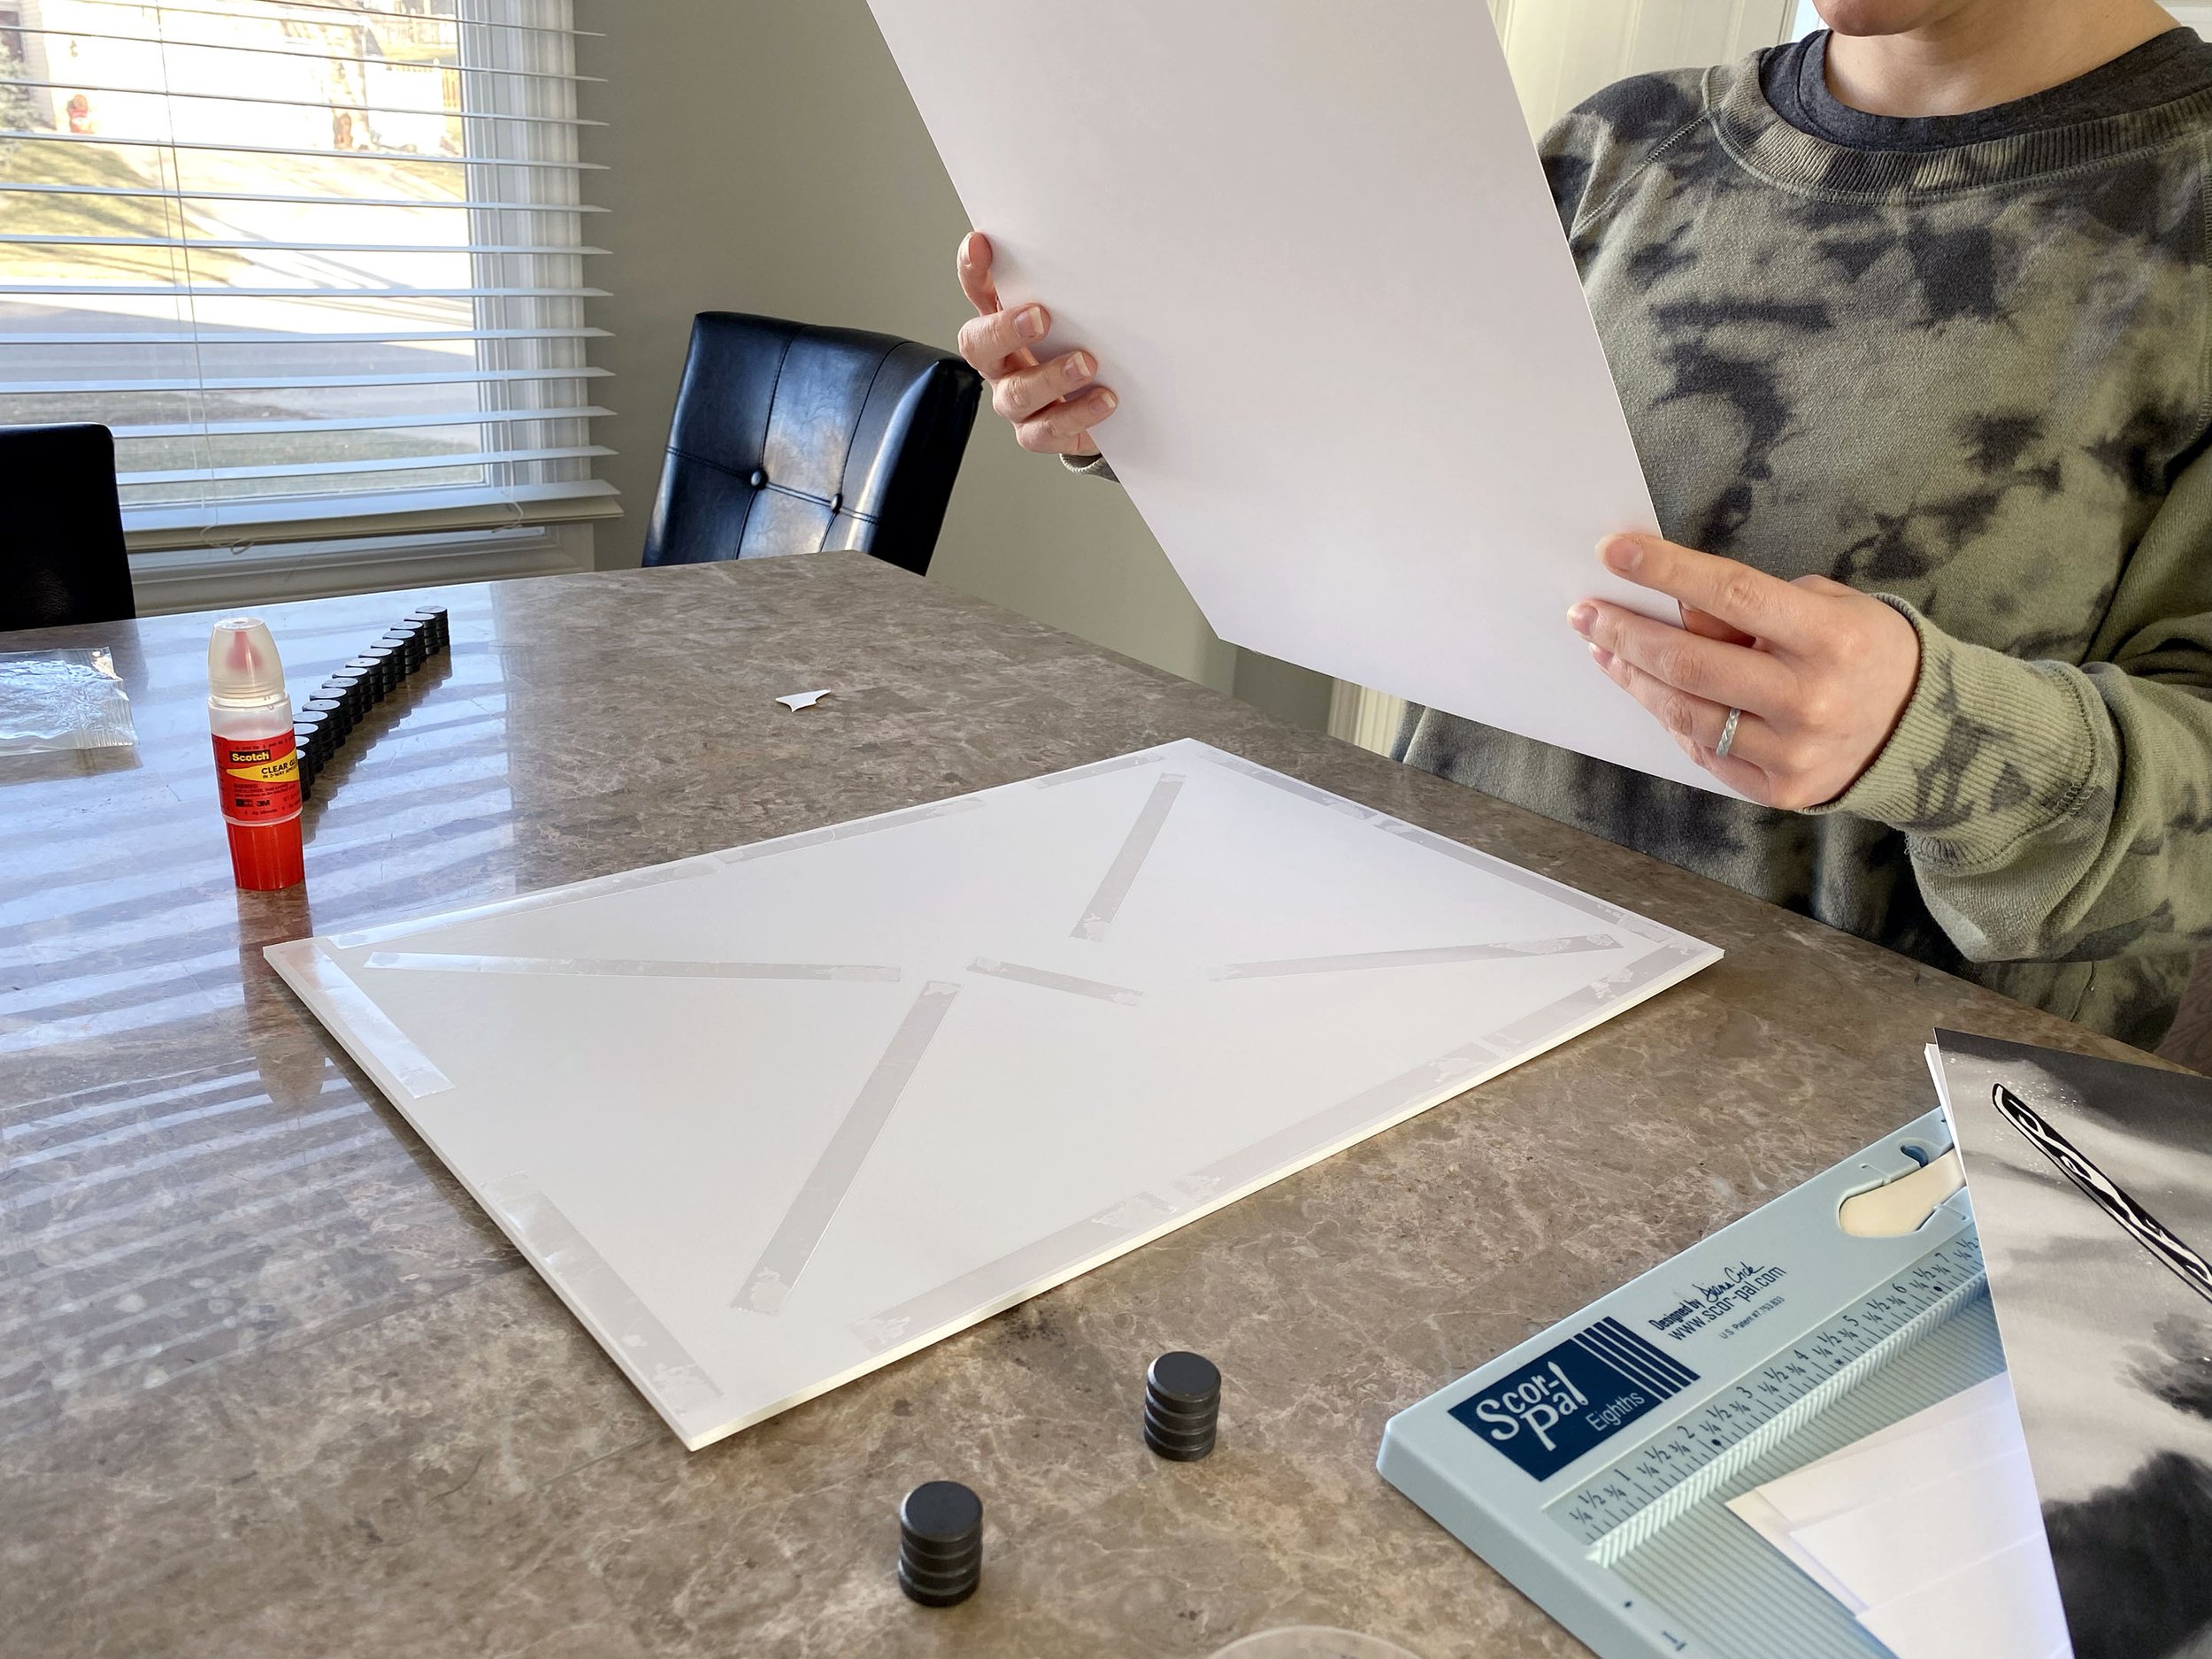
The next step is to attach the print to the foam board. So, I tear off pieces of the double-sided tape (the double-sided tape dispensers used for scrapbooking work really well for this) and make sure the edges and parts of the middle are sticky. Then, I carefully place the print on the board. Sometimes, I have the print coming down onto the flat board and sometimes, I stand them up and align the bottom first before letting the rest of the print fall into place. The key is to make sure the print lays flat without any bubbles. If some of the foam board shows because the print isn’t straight, I just trim off the pieces of foam that are showing.
Once my print is attached to the foam board, it is time to stick on the magnets. I’ve used the typical Elmer’s glue and the Scotch clear glue with two ends, and they both work well. This is the easy part. Just dab some glue onto one side of the magnet and stick it to the foam board - one for each corner. Then, I leave it to dry for at least 30 minutes. I haven’t had any magnets pop off yet, so I’d say everything holds up well.
And there you have it! Of course, there are various ways to set up a backdrop element and none of them are wrong. Go with whichever suits your taste and budget. I hope I at least got you thinking about why and how to display your prints or merchandise behind you. If you have any event-related questions, let me know!